Sunday, January 16, 2011

RedPine Wifi Card: Going through the Sample Source Code

Here's another part of the Redpine Wifi adventure.

My main aim is to modify the sample firmware source code and create a very simple app on Python on PC (and put it on my Android) and display the text on the LCD of the Renesas Starter kit. Another goal is to create a simple display of text on Hyperterminal from Renesas Starter kit.

Renesas and Wifi card in Receive Mode

I modified the recv_cb0 function on the rsi_spi.c file. Source Code Link

At the rsi_initialize_netwrok_config1 (by the way, the netwrok is not really spelled right on the source code) function on network_config.c file, you will see the networkConfig->stLocalPort = 800;. This is the port number in which the client program (like Hyperterminal, a python program that uses socket, etc.) will connect to. Here is a very short Python script to send a string to the Renesas kit and display the text on the LCD.

Renesas and Wifi card in Transmit Mode

This is easier than the receive mode. On the main function of the RSRX62N2201DEMO.c, I just modified the sending on the while loop to be able to see "Hello" periodically on Hyperterminal. Source code link (I included all the things inside the infinite loop and put my sample code inside the #if 1)

Saturday, January 15, 2011

RedPine Wifi Card: Getting Started


The Java Demo Application of the free RedPine Wifi Card is very easy to use. The demo application - by default - can connect to a router with no security key. I removed the security key on my router and tried the included Java demo app and it worked! :D


When you connect it to a router with security key, you need to modify the network_config.h file as stated on the Quick Start Guide. At minimum, here are the things needed to be changed.

Not stated on the Quick Start Guide is that it only supports WPA2 (AES) mode of security and does not support WEP and WPA (TKIP). I was stucked on the testing of the Wifi Card on my secured router (using WEP) because I quickly jumped on making it work and didn't even managed to read first the documentations on the CD (lesson learned here haha). So I just changed my router's key to a WPA2. And it can be controlled now by the Java demo app.

Next is to create a Python app on my desktop and control the Wifi card. Final project is to control the Renesas using Android.

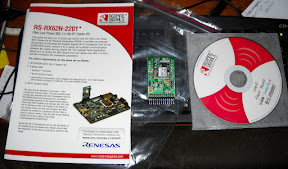
Just Received my Free Redpine Wifi Card!

Thank you to Redpine for the wonderful free Wifi Card.


This will be a good learning adventure. :)

Wednesday, December 29, 2010

My Damaged CCFL Inverter: Repair

It's Wednesday, and I am thinking of what to do today. My damaged CCFL inverter at my motorcycle just popped into my mind. I quickly went out and took the CCFL inverter circuit on my bench.

Upon opening, I saw a busted transistor.


Upon checking the other transistor using the E-gizmo's DMM transistor testing feature (this is a very affordable DMM from E-Gizmo), I was able to say that the other transistor is also damaged.


I replaced the two transistors and a diode with a crack(?).


All in all, three components are damaged but they are easily identified and replaced. I hope that this guide may help solve those who have similar CCFL inverter problems.

Tuesday, December 21, 2010

Renesas RX62N's uIP TCP/IP Stack

The sample code provided by Renesas on their HEW IDE is a very good example on how to connect via Ethernet. It uses the web browser to control the RX62N. I modified the sample project and created a Python script on the Android to be able to control the demo kit via Wifi.

Android Communication via Wifi -- router --- Ethernet of RX62N using uIP TCP/IP Stack

Monday, December 20, 2010

Renesas RX62N Demonstration Kit

At last, I was able to get my free Renesas RX62N Demo Kit.


Through visual inspection, I could see that this board has so things in it:
- J-link
- Ethernet
- USB Host/OTG
- CAN
- LCD
- Microphone
- Speaker
- Audio Out
- Micro SD
- Com Port
- Temperature Sensor
- 3-axis accelerometer

All the informations and downloads can be acquired on Renesas website.

Here are the application notes.

Monday, December 13, 2010

VirtualBox TCP/IP Communication (Host and Guest)

I want to experiment with C# and Python's socket programming. I don't want to use 127.0.0.1 anymore in my sample program as I want to have a simulation of like two computers sending and receive data via TCP/IP.

My solution is to use a VirtualBox with another Windows OS in it.

I am struggling with this since yesterday but I was able to get it by today. Here is a video procedure.
(The video lagged a lot because my PC is too slow to record and run the virtualbox at the same time. The mouse pointer is also not visible on the video, maybe it is because of the Guest Additions on the VirtualBox).

Here are the procedures:

1. On Host and Guest: Turn off the firewall. My preliminary setting: firewall turned off and No connection to the internet.
2. On Host: Bridge a LAN connection and the VirtualBox Host-Only Network. Then assign an IP on it. (On the example, 192.168.70.4)
3. On Guest: Go to network settings, Choose a network adapter, choose "Attached to Bridge Adapter" and choose the name "MAC Bridge Miniport".
4. On Guest: Run the Virtual OS.
5. On Guest: Set the IP Address of the Ethernet Adapter. (On the example, 192.168.70.5).
6. On Host and Guest: Ping both the address to be able to confirm that there is a connectivity.

Additional test: Hyperterminal was used to test if handshaking will occur and if messages can be sent.

On Future: I will be replacing the Virtual OS with an Ubuntu and use python for socket programming.